 Dyson
Dyson
Up to $550 off selected Dyson products + bonus gift
Save up to $550 on selected vacuums, hair tools and air purifiers from Dyson. While stocks last. T&Cs, exclusions apply.
Want to know which mascara you should buy? Or which BB cream is best for your skin? Are you interested in the latest makeup releases and where you can buy it all in Australia?
Well beauties, you've come to the right place! For all the beauty and wellbeing news, trends, reviews and sale info, look no further.
Use the supplied filters to refine your search.
 Dyson
Dyson
Up to $550 off selected Dyson products + bonus gift
Save up to $550 on selected vacuums, hair tools and air purifiers from Dyson. While stocks last. T&Cs, exclusions apply.
 Myer
Myer
Mid Season Sale: Up to 50% fashion, beauty, home and more
Score huge discount on women's, men's & kids' clothing, homewares, toys, beauty brands, tech and more at Myer. Hurry, limited time only. T&Cs apply.
 Amazon
Up to 80% off: Today's Deals
Save up to 80% on selected toys, books, appliances, beauty, health, laptops and more at Amazon. Hurry, while stocks last. T&Cs apply.
 JSHealth Vitamins
Buy 2 products, get 30% off your 3rd
Apply the promo code AUFNDR at checkout and score 30% off your 3rd vitamins, skincare, haircare, protein powders and collagen purchase at JSHealth Vitamins. T&Cs apply.
 Temu
Temu
Up to 90% off selected items
Save up to 90% on a wide selection of fashion pieces, homewares, beauty products, appliances and more at Temu. While stocks last. T&Cs, exclusions apply.
 David Jones
Up to 50% off select beauty and gift sets
Save on Glasshouse Fragrances, Lancôme, Dermalogica, Clinique, Estee Lauder and so much more. Limited time only. Exclusions, T&Cs apply.
 Adore Beauty
Up to 50% off clearance beauty items
Get up to 50% discount on select beauty products from Skinstitut, Dermalogica, Alpha-H, and more at Adore Beauty. Limited time offer and while stocks last. T&Cs apply.
 Oz Hair and Beauty
5% off your orders with code: FINDER5
Use the code FINDER5 to enjoy 5% off your orders on hair and beauty products, skincare, wellness and more. T&Cs apply.
 Raw Beauty Skincare
15% off your first order
Sign up for the newsletter to enjoy 15% off your orders on natural skincare products at Raw Beauty Skincare. T&Cs apply.
 Ugly Swan
FREE shipping for all orders over $39.95
Shop scream-free bristle hair brush and unicorn towels at Ugly Swan and enjoy FREE shipping. T&Cs apply.
 Ugly Swan
Up to 28% off bundles
Buy the hair care packs and save at Ugly Swan. Hurry while stocks last. T&Cs apply.
 Oz Hair and Beauty
FREE 5-piece Dermalogica gift valued at $80
Receive FREE 5-piece Dermalogica gift with orders over $169 at Oz Hair and Beauty. Valid for a limited time only. T&Cs apply.
Ends
 Shaver Shop
Up to 80% off sale
Enjoy huge savings on male grooming and oral care from Braun, Philips, Oral-B and more at Shaver Shop. While stocks last. T&Cs apply.
 Oz Hair and Beauty
Up to over 60% off sale + 5% off your orders with code FINDER5
Enjoy up to over 60% off Fanola, Nak Hair, Pureology, Inika, Lancôme and more at Oz Hair and Beauty. While stocks last. T&Cs apply.
 Oz Hair and Beauty
Up to 60% off selected brands
Enjoy great discount on hair and beauty products at OZ Hair and Beauty. Valid for a limited time only. T&Cs apply.
 Adore Beauty
20% off select Narciso Rodriguez EDP products
Enjoy up to 20% discount on selected Narciso Rodriguez EDP products on sale at Adore Beauty. Limited time offer and while stocks last. T&Cs, exclusions apply.
Ends
 Adore Beauty
20% off Hot Tools Black Gold Volumiser Set
Save 20% when you order Hot Tools Black Gold Volumiser Set at Adore Beauty. Limited time offer and while stocks last. T&Cs, exclusions apply.
Ends
 Adore Beauty
15% off select Silver Bullet products
Grab up to 15% discount on selected Silver Bullet hair stylers and tools on sale at Adore Beauty. Limited time offer and while stocks last. T&Cs, exclusions apply.
Ends
 Adore Beauty
25% off Sulwhasoo Concentrated Ginseng Renewing Serum
Get 25% discount on Sulwhasoo Concentrated Ginseng Renewing Serum + bonus gift at Adore Beauty. Limited time offer and while stocks last. T&Cs apply.
Ends
 Adore Beauty
Up to 30% off select Nioxin hair care products and bundles
Enjoy up to 30% savings on selected Nioxin hair care products and bundles on sale at Adore Beauty. Limited time offer and while stocks last. T&Cs, exclusions apply.
Ends
 Adore Beauty
20% off select Mermade Hair straighteners and curlers
Grab up to 20% discount on selected Mermade Hair styling tools at Adore Beauty. Limited time offer and while stocks last. T&Cs, exclusions apply.
Ends
 Sephora
Up to 50% off makeup, skincare, hair care & more
Valid on selected items and for a limited time only at Sephora. While stocks last. T&Cs apply.
 esmi
esmi
10% off your first order
Join the makeup cartel and score 10% off your first order, plus, be the first to know exclusive offers and discounts. T&Cs apply.
 eBay Australia
Up to 60% off selected beauty products and tools
Save up to 60% on select beauty products and tools on sale at eBay. While stocks last. T&Cs, exclusions apply.
 Myer
Myer
FREE gifts with your purchase
Receive FREE gifts from beauty brands like Estee Lauder, Lancome, Filorga, Versace, Ferragamo and more from Myer. Minimum spend required. T&Cs apply.
 Too Cool For School
Up to 30% off sale
Save up to 30% on selected beauty products on sale at Too Cool for School. Limited time offer and while stocks last. T&Cs, exclusions apply.
 Arktastic
Up to 40% off sale
Enjoy up to 40% discount on selected beauty products and watches for men and women at Arktastic. Limited time offer and while stocks last. T&Cs apply.
 Arktastic
Up to 44% off beauty gift sets
Save up to 44% on selected beauty gift sets from Korean beauty brands such as Some By Mi, Missha, Pyunkang Yul, Laneige and more at Arktastic. Limited time offer and while stocks last. T&Cs, exclusions apply.
 Arktastic
Up to 40% off Korean makeup products
Enjoy up to 40% off selected makeup products from top Korean brands like Innisfree, Etude House, Missha, Peripera and more at Arktastic. Limited time offer and while stocks last. T&Cs, exclusions apply.
 Oz Hair and Beauty
10% off Clean Beauty products
Valid on selected products from Olaplex, Fanola, Nak and more at Oz Hair & Beauty. While stocks last. T&Cs apply.
 MAC Cosmetics
Up to 20% off selected gift sets and kits
Get up to 20% discount on selected gift sets at MAC Cosmetics. While stocks last. T&Cs, exclusions apply.
 MAC Cosmetics
30% off selected shades and kits
Get 30% discount on selected MAC Cosmetics. While stocks last. T&Cs apply.
 StrawberryNET
Up to 80% off clearance sale
Shop and get up to 80% off makeup, fragrance, and more. T&Cs apply.
 THE ICONIC
30% off beauty
Get 30% discount on selected beauty products from Giorgio Armani, KVD Beauty, Aveda, CTZN Cosmetics, and more at THE ICONIC. Limited time offer and while stocks last. T&Cs, exclusions apply.
 Temu
Temu
Up to 58% off hair dryers and accessories
Save up to 58% on selected hair dryers, accessories, and organizers on sale at Temu. While stocks last. T&Cs, exclusions apply.
 The Beauty Chef
Up to $70 off beauty bundles
Get up to $70 discount when you buy The Beauty Chef's curated beauty bundles. T&Cs apply.
 glamaCo
Up to 75% off sale
Grab up to 75% discount on select beauty products, tools and accessories on sale at glamaCo. While stocks last. T&Cs apply.
 Amazon
$20 off your first beauty products purchase
Get $20 off L'Occitane, Elizabeth Arden, FOREO and more at Amazon. Minimum spend $89. While stocks last. T&Cs apply.
 Amazon
Over 30% off everything: Outlet Store
Find thousands of discounted items such as beauty, books, clothing, electronics and more at Amazon. While stocks last. T&Cs apply.
 ActiveSkin
Up to 45% off sale
Shop ActiveSkin's clearance section and enjoy up to 45% discount on sale items. Valid while stocks last. T&Cs, exclusions apply.
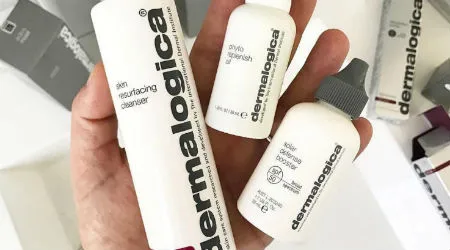
A cure-all cleanser that can banish blemishes, congestion, dullness, breakouts and reduce fine lines.
Read more…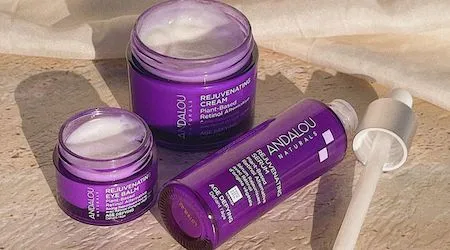
"I was sceptical of this plant-based alternative to retinol at first, but it appears mama nature has done it again."
Read more…
The 12 products are cruelty-free, Australian made and pretty dang affordable.
Read more…
From our favourite sunscreens to serums and tanning products, these are the skincare items you need, want and deserve during summer.
Read more…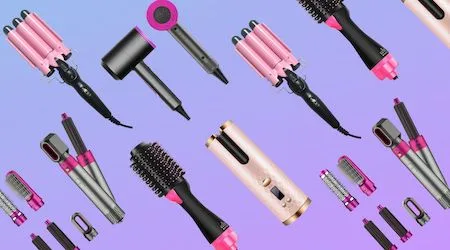
Tell your hair and bank balance to thank us later, because these affordable hair styling dupes are all $100 or less.
Read more…
2021 has had some incredible and also surprising hair trends. Move over mullets, the 2000s are back, baby.
Read more…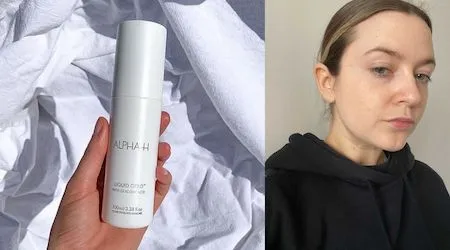
The skin purge is brutal but the long-term results of the Liquid Gold toner are worth the wait.
Read more…
If you can afford it, this potent night serum will make a great addition to your skincare routine.
Read more…
This mineral sunscreen feels comfortable on the skin and makes me look like a glowing goddess.
Read more…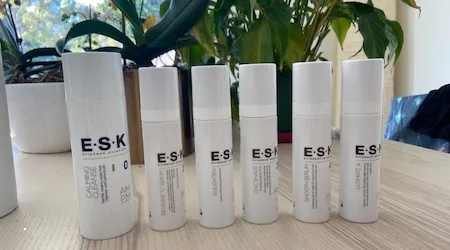
ESK offers scientifically proven skincare products that are simple to use and effective.
Read more…
From cleanser and moisturiser to pimple patches, Mecca Max has got your skincare routine sorted.
Read more…
From naughty breakouts to dry patches that rival the Sahara Desert, these 7 sheet masks work miracles.
Read more…
This is exactly how you can get your hands on Skincare by Hyram's very own brand.
Read more…
After trying 5 different Glow Recipe products, here's our no-BS review of which ones are (and aren't) worth forking out for.
Read more…
Know Beauty includes cleansers, moisturisers and serums rooted in DNA personalisation. Here's how you can get your hands on it.
Read more…Icons made by Freepik from www.flaticon.com
These are the six best epilators you can buy in Australia right now.
If you're looking for an easy-to-use, at-home hair removal solution, check out these Australian retailers.
From the best cheap dumbbells to the best option for bodybuilding, we’ve found the 10 best dumbbells you can get online right now.
If you're a total animal lover, this is where you can buy vegan makeup online in Australia.
This gentle duo will have your skin clean, cleared and glowing in next to no time.
If you want smooth, hydrated and nourished skin, you need to try the Youthquake moisturiser from Marc Jacobs Beauty.
From the best cordless option to the top device for sensitive skin, these are the 7 best IPL hair removal devices you can buy online.
These are the 14 best fake tan products you can buy right now in Australia.
On the hunt for a new scent? Check out this list of retailers letting you browse and shop a huge range of fragrances online.
Here are the top 18 sites to satisfy all your cosmetics and beauty needs, offering flexible returns policies and free shipping to boot.